Get started with taking the first step towards attracting and converting your website visitors into more bookings with Booking Pop’s engaging widgets. Follow the guide below to install Booking Pop in Google Tag Manager in a less than two minutes.
1. Get Your Booking Pop Widget Code
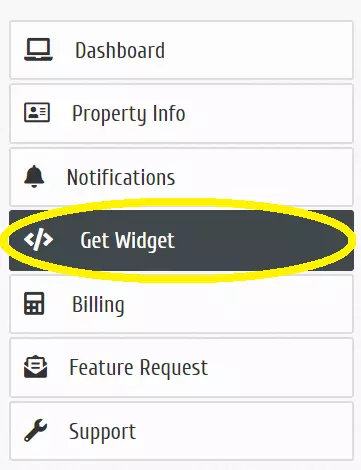
Log in to your Booking Pop account and click “Get Widget” in the left side panel.
2. Copy Code to be Added to Your Google Tag Manager
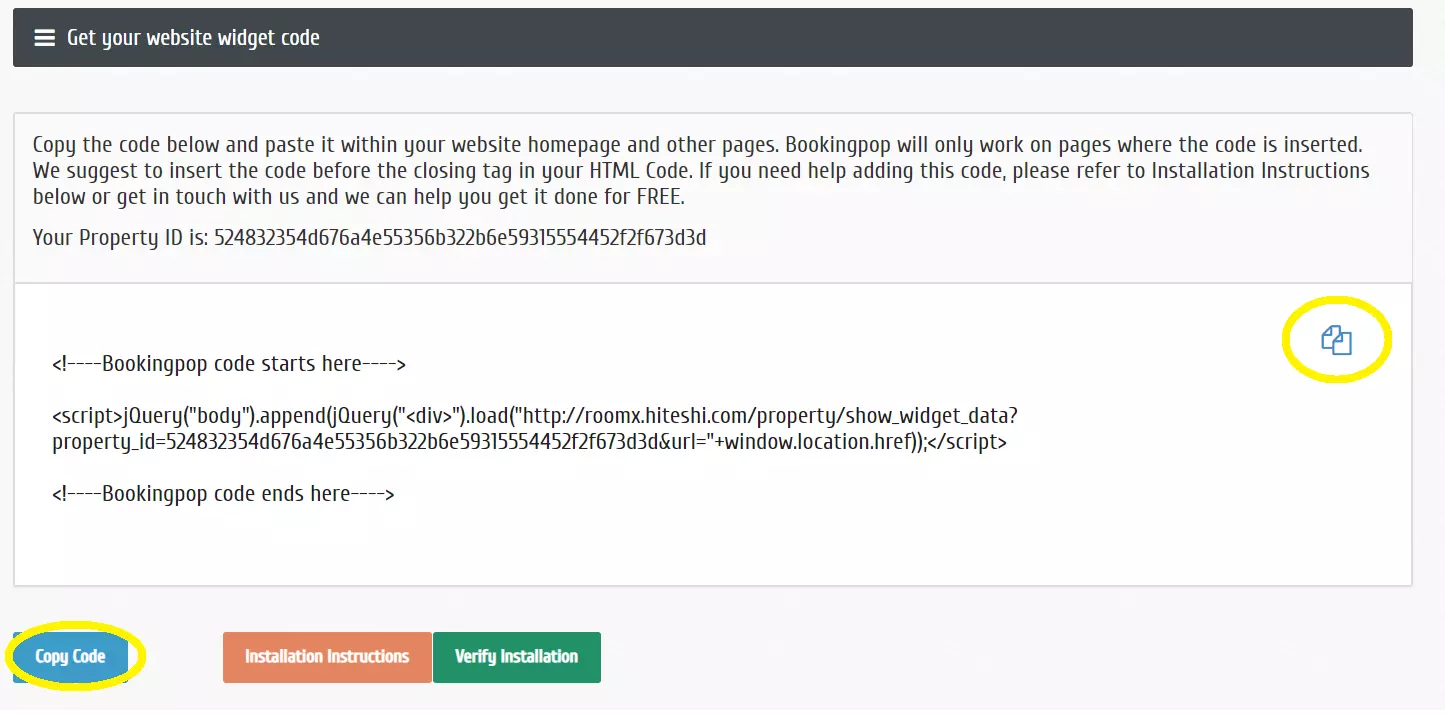
Copy your unique Booking Pop code as seen below:
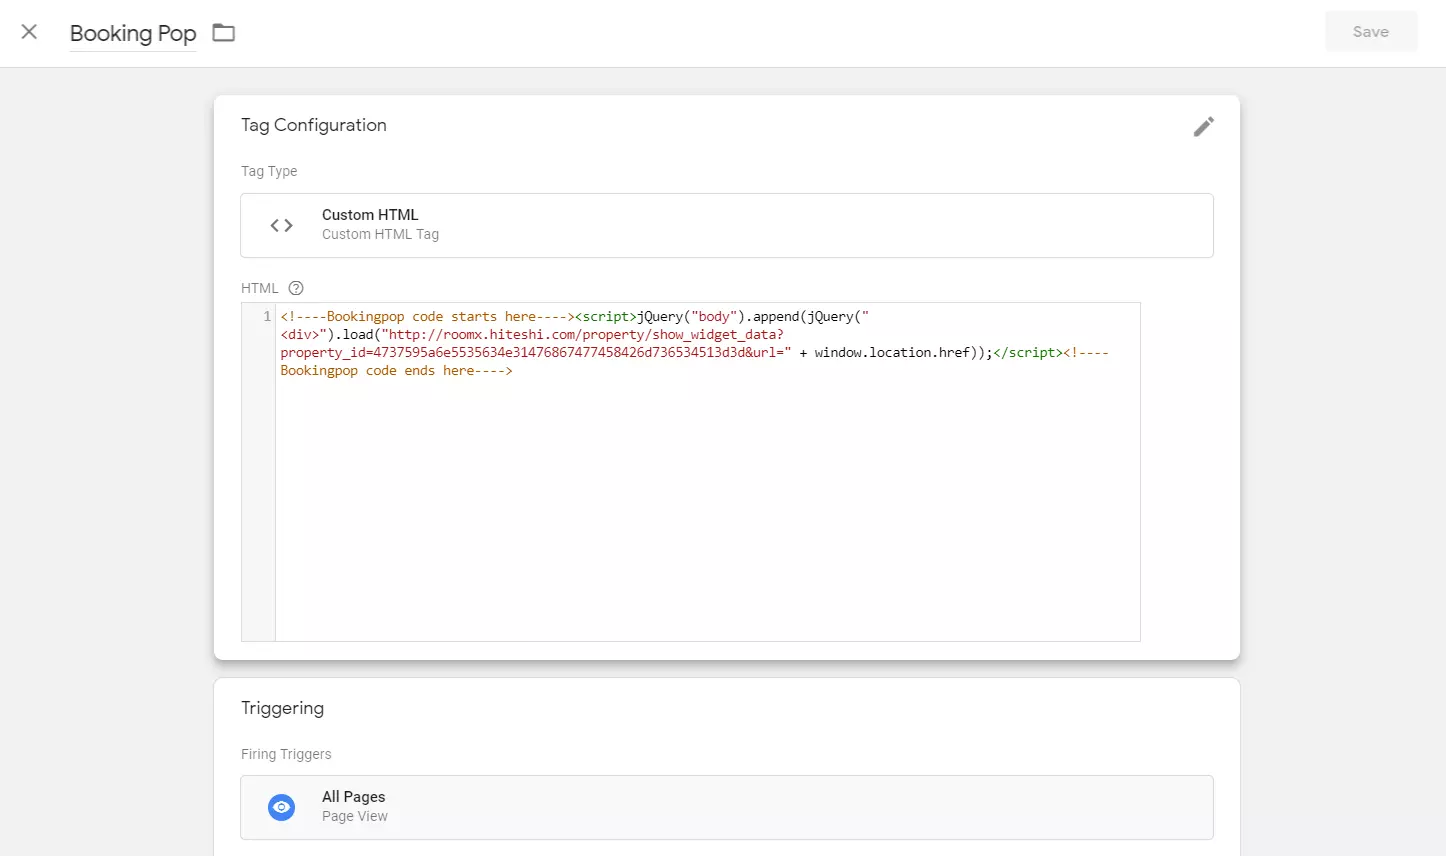
3. Paste Code into Your Google Tag Manager:
- Create a new tag
- Select Custom HTML for the tag configuration
- Paste the Booking Pop code in the HTML section
- Add an All Pages trigger
- Click save
- Click submit and publish your changes
- It may take up to 10 minutes for Google Tag to update and show the widget
- Congratulations! You are ready to create notifications for your website and increase your conversion rate
If the widget is not appearing, please try adding the following to the beginning of your script:
<script src="https://cdnjs.cloudflare.com/ajax/libs/jquery/3.5.1/jquery.min.js"></script>
Or reach out to us at .